
Growing Kūmara in the Home Garden: From Slips to Harvest
How To Grow Kumara In A New Zealand Home Garden. Kūmara is a true New Zealand taonga (treasure) and a staple of the Kiwi roast dinner. While it is technically a sweet potato, growing kumara nz style requires a slightly different approach than generic overseas guides might suggest. Our temperate, often unpredictable climate means we have to pay special attention to soil warmth and timing to get a decent crop.
Whether you have a large backyard plot or a few deep raised beds, here is everything you need to know about how to grow kumara successfully in Aotearoa.
Starting Right: What are Kūmara Slips?
Unlike standard potatoes where you plant a “seed potato” directly into the ground, kūmara are grown from rooted shoots called slips.
You can buy bundles of kumara slips nz from garden centres from October onwards, or you can sprout your own! To grow your own, take a healthy, unwashed organic kūmara in late winter (August/September) and bury it halfway in a tray of damp sand or potting mix. Keep it in a warm, sunny spot (like a glasshouse or a sunny windowsill). After a few weeks, green shoots will emerge. Once these shoots are about 15-20cm long, carefully twist them off the main tuber—these are your slips, ready for planting.
The Secret to Success On How To Grow Kumara: Soil Warmth and Mounding
Kūmara are subtropical plants. They hate cold, waterlogged soil. The biggest mistake Kiwi gardeners make is planting them flat in heavy dirt. Here is how to prepare your garden:
- Wait for the Warmth: Do not plant your slips out until all risk of frost has completely passed and the soil has warmed up—usually late October to November, depending on your region.
- Create Mounds: You must grow kūmara in raised mounds or ridges (about 20-30cm high). Mounding improves drainage and allows the sun to heat the soil from the sides, providing the warmth the tubers desperately need to swell.
- The “J” Curve Planting Method: When planting your slips, don’t just stick them straight down. Lay the bottom half of the slip horizontally in the soil so it forms a “J” shape, leaving the leafy top above ground. The tubers form along this buried horizontal stem.
- Avoid High Nitrogen: Do not plant kūmara in freshly manured soil or feed them with high-nitrogen fertilisers. This will give you a massive, beautiful canopy of green leaves but tiny, stringy tubers. A light dressing of blood and bone or wood ash (for potassium) is plenty.
The Best Kūmara Varieties for NZ Gardens
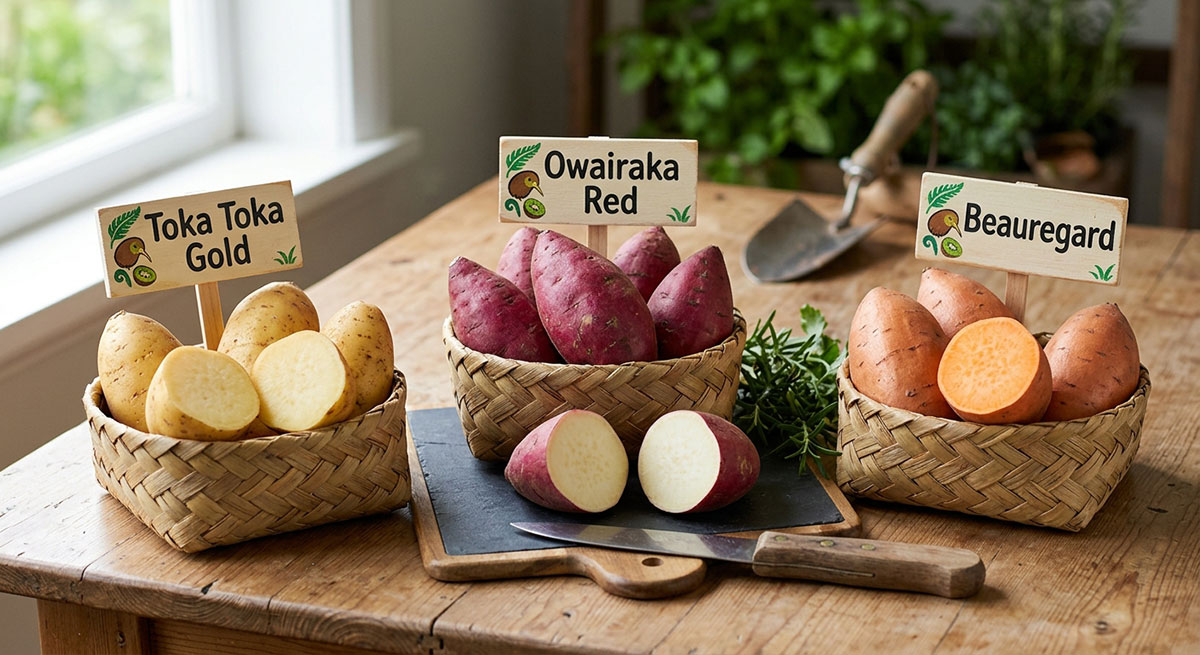
We are lucky to have several distinct, reliable varieties bred or adapted specifically for New Zealand conditions:
- Owairaka Red: The classic Kiwi favourite. It has distinct deep red/purple skin with creamy white, firm flesh. It is reliable and holds its shape beautifully when roasted or boiled.
- Toka Toka Gold: Known for its golden skin and soft, sweet, orange flesh. It breaks down easily, making it the absolute best variety for mashing or adding to soups.
- Beauregard: A sweeter, softer variety with orange skin and bright orange flesh. It is slightly faster to mature, making it a good option for cooler regions with a shorter growing season.
Harvesting Kūmara NZ: Timing and Curing
Kūmara need about 4 to 5 months of growing time. You will know it is time to start harvesting kumara nz when the leaves begin to yellow and die back in autumn (usually March or April).
Crucial Rule: You must harvest before the first autumn frost hits. If a frost kills the vines, the cold will travel down the stem and cause the tubers to rot in the ground.
Carefully dig them up using a garden fork, starting well back from the mound to avoid stabbing the tubers. Kūmara skin is incredibly thin and fragile when freshly dug.
The Curing Process
Do not eat them straight away! Freshly dug kūmara are quite starchy. To develop that rich, sweet flavour and to toughen up the skin for winter storage, they need to be “cured.”
Leave the unwashed tubers in a warm, dry, well-ventilated spot (out of direct harsh sunlight) for 1 to 2 weeks. This curing process converts the starches to sugars and heals any minor scratches on the skin. Once cured, store them in a cool, dark, and dry pantry—never in the fridge, as the cold will ruin their texture.